
Sharp Engraving with a Sharpie
From our friends at Tormach
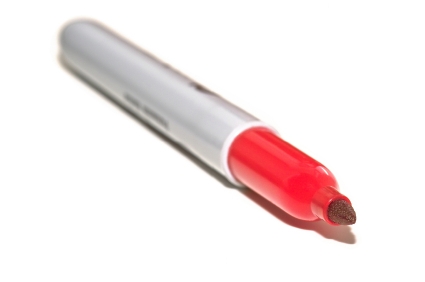
Here’s an easy way to prove out your program; all you need is a Sharpie marker. This technique works best with fine 2D detail work like engraving. Mount the marker in a toolholder (a drill chuck works great for this), place it in the spindle, and touch-off the tip of the marker to just above the workpiece surface. Put the spindle in manual control and disable rotation – this is important – and the Sharpie will trace out the tool path right on the surface when you run the program.
Make sure to disable spindle rotation, or the ink will fling. Also, be aware of Z-position so you don’t plunge the marker into the workpiece and snap it. Both outcomes will result in a cleaning detour.
When you’re satisfied with the program, wipe off the ink with acetone and start cutting for real. You can also use this visual for 4th axis work, like engraving around a round bar.
Please do us a tremendous favor and forward this e-mail to your machining friends!
Are you not a subscriber to DIGITAL MACHINIST? Visit us at www.digitalmachinist.net and request a no-obligation issue, or call and request it at 1-800-447-7367. Tell them you received an e-mail from a friend!
And don't forget to check out Digital Machinist’s page on Facebook and our Twitter feed!
Your friend thinks you’ll enjoy DM, or you wouldn’t have this e-mail!
Get Involved!
Do you enjoy our e-mail tips? Has one of them ever "knocked something loose" in your head? Your tip could be a future e-mail blast from your favorite magazine. Just send your tips to gbulliss@villagepress.com. If we use your tip, we will extend your subscription by an issue. We like to see 200 to 300 words, plus an image, if available. Thanks!
We hope you enjoyed this e-mail tip, brought to you by your friends at Digital Machinist, dedicated to precision metalworking.